Friday, May 1, 2009

Skating - It's More Important in Skiing Than You Think

Typically, the last thing you want to do after arriving at one of those fancy Zermatt chalets and first getting on your skis is skating. However, this is something that is severely underrated by all levels of skiers. Some of you may not even know what skating is (if so, go request a lesson on skating right away and tip your instructor lots of cash, preferably me). To this end, it is important to take a closer look at what exactly happens during our skating on skis.

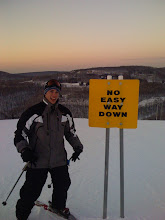
Skating's Importance

So, what is skating? Basically, skating is exactly what is says, except on skis as opposed to ice skates. You push off of one ski, balance yourself on the other ski, and keep the cycle going. It is a great maneuver to propel yourself forward when you need to get somewhere on the snow that simply facing downhill and skiing will not allow.

A skier that is skating from sportive.giron-1000.com
Why is skating so important? Well, what's not important about it? Not only does it allow you to efficiently and less-energetically get yourself back to your skiing partner who fell (or further away from your skiing partner), it incorporates all of the basic skiing movements that you need to ski successfully anywhere else on the mountain. It is said that you can tell how good a skier is just by looking at him or her skate, because it is a test of how well you blend and execute your basic movements.

In summary, Martin Heckelman writes in The New Guide to Skiing that "While skating, the legs are taught how to 'flex' and 'extend' ... the body is trained to shift weight from ski to ski and one learns how to change direction easily while moving. Skating also helps to improve a skier's body awareness and balance."

How to Skate on Skis

To push off of your ski, bend the knee of the ski you are pushing off of. Feel the power and potential energy in your bent knee, then extend and push that knee towards the new direction.

The most important principle in skating is to make sure you are pushing off of the inside EDGE of your ski rather than pushing off of a flat ski. Always, always, always make sure you are pushing from the ski's edge. This maximizes energy efficiency, and thus will not tire you out as quickly. After all, skating does require energy, so make it easier for yourself by using the edges. To do this, make sure you roll the ankle of your ski in contact with the snow inwards towards your big toe side of your ski.

After pushing off of the big toe, inside edge of your ski, glide your body out toward the direction you wish to propel towards. This should be in the same direction as the new ski in contact with the snow. You want to make sure that you do not look like a wobbling Tower of Pizza - that is, do not move your body side to side much. Focus on gliding all your momentum towards the direction you wish to go in. If you were driving a car and wanted to go straight, you would steer straight and not sideways, right? It's no different in skiing.

Also, when landing on your new ski, there is a quick feedback test to see if you are balanced. You should be landing on the entire ski evenly. If you notice the new contact ski hits the snow with the tip first, you are too far forward in your stance. If you see your tail hit the snow first (more common), you are too far back in your stance. See the Balance post to adjust this.

Skating is a skill that comes only with practice, so, go practice! As you get better at it, you will notice that you feel less tired after making the same dash to the chairlift. It is a great feeling to get there and realize you are not out of breath like you normally are, all due to technique improvements.

As you get better, you can also practice skating while gliding down a gentle slope (on a green circle trail) or on even more advanced terrain if you feel even more advanced. This will require practice, some athleticism, and more precise control and timing while pushing off of your edges. It will, however, allow you to pick up some speed. And if you don't like speed, go home. Or just practice a little more.

Monday, April 20, 2009

Freestyle Skiing and the ATML Method

Many crazy people are always trying to bust the biggest move in the trauma park...I mean, the terrain park. However, few skiers really know how to approach new terrain features or how to grow comfortable and properly learn how to ski them. What's the real way to learn so that you don't tackle your tips and tails? Magic.

Actually, magic is not nearly cool enough for skiing. So instead we use the ATML method. What is the ATML method? Well it breaks down to the following: Approach, Take-off, Maneuver, and Landing. By focusing on each of these parts separately and then blending them together (in the correct order), it is much easier to develop your skills as a freestyle skier, whether it's for the superpipe or the small bump on the side of the green circle you are skiing. Skiers and snowboarders alike use this method.

Approach: This is where all the fun starts. Have you ever started toward the ramp of a wooly mammoth-sized jump and then realized you have too much speed? Well instead of letting your bladder go, try analyzing the approach beforehand. Before you even put on your equipment, walk to the beginning of the feature (a feature could be a jump, a rail, a box, etc.) and LOOK at it. Look at the differences between one spot and the next. Touch the feature and feel what it is like. If it is an icy, slick rail, you will approach it differently then if it were a rough, course, dry box. After analyzing the approach, determine what speed you think would be appropriate to enter the feature. Also look at where would be the best area to approach it from uphill (i.e. Would it be better to come from the left side or right?).

Take-off: The take-off is pretty self-explanatory. The main focus here is how you want your body to be positioned at the time of your take-off and how aggressive you are going to be with the entry.

Maneuver (or Method): This is the actual trick you will be performing. It may be simply keeping your balance in the air, a nosegrab, an iron cross, or sliding on the rail. It is important to know ahead of time what maneuver you plan on performing and how to do it.

Landing: In your landing, it is important to land with soft, flexed joints - somewhat bent knees, flexed ankles, flexed hips. You do not want to stiffen up your body in fear because you see that you are about to fall to a scary death. (The chances of that actually happening are slim - you usually won't walk away with more than a broken clavicle or a fractured vertebra). Stiffening up your body makes you less flexible and more prone to stress - that is, bones break more easily...ouch. Make sure you aim for a nice, balanced position so that you finish looking like a pro. Then smile for the judges/TV camera/mom/imaginary stadium there to watch your magnificence.

'Safety Culture - ATML Method' from SugarBowl.com
After you have figured out each piece of the puzzle independently, then piece them together to make a masterpiece. It is art really.

Two Additional Foods for Thought

First, remember that balance is essential to any type of skiing - including freestyle. Go back to the "Balance - The Foundation for the Rest" post to review some necessary balance skills.

SnowShack Ski and Snowboard Accessories
Second, wear a helmet, wear a helmet, wear a helmet. And if you are truly interested in deeper thought, wear a helmet. Wrist guards can help too. You can buy some cool ski accessories for low prices at SnowShack Ski and Snowboard Accessories.

Disclaimer: SkiBlog-SkiBlog and any of its authors are not responsible and are not liable for any injuries or deaths associated with your skiing. We will accept recognition or cash for gold medals or first place awards though.

Monday, April 13, 2009

The Bend and Extend Concept: Leg Retraction and Leg Extension

The bend and extend concept is one of my favorite things to perform myself as well as to teach. For one thing, the words rhyme (so cool - this does not happen a whole lot in the skiing world). But what exactly is the bend and extend concept? Oh the suspense...

This is commonly known as leg retraction and leg extension. It applies mostly to more advanced, dynamic skiers at moderate to fast speeds and helps out a ton in starting carving turns. The principle is that through your turn, you want to bend your inside leg/knee and extend your outside leg/knee. If you need a review of what the inside and outside skis are, see the picture below.


So, you bend your inside leg, extend your outside leg, pretty simple right? Well, ya it is pretty simple.

To do this, you want to push down with your outside leg in order to extend it and then simultaneously bend, or retract, your inside leg by bending your knee and lessening that ski's pressure on the snow.

Why do this? While the modern world says, "Everything comes down to money," the physics world says, "Everything comes down to energy." When you extend your outside leg and pressure your ski, the ski builds up mechanical potential energy from the pressure you are applying to make the ski flex. On your inside ski, the retraction (bending) releases the energy and allows for a smooth transition from turn to turn. This will result in a feeling of your skis jumping forward beneath you as all the energy releases.

Martin Heckelman writes in his book, The New Guide to Skiing, "When you retract your leg, you release this energy, causing a rapid and fluid movement of your body downhill across the skis. This enables you to very quickly press onto the new outside ski, which will allow you to carve the ski very early in the turn."

A couple things to keep in mind while practicing these movements:

1.) Make sure you continue to roll and flex your ankles in the direction of your turn.

2.) When extending, make sure you are on the uphill edge of both skis. The outside ski will often be pushed downhill so that your stance opens so wide that little kids think it's a tunnel for them to go through. Monitor this and keep your stance at a constant width throughout the entire turn.

Share this technical tidbit with your friends. They will be impressed that you came with this knowledge out of nowhere. Then refer them to this site...

So, get out on the luxury ski mountain and bend your inside knee, extend your outside knee, and you will be well on your way towards becoming a better, more hip skier than your skiing buddies. And that's what everything really comes down to.

Monday, April 6, 2009

Skiing Those Things Called Moguls

Although bumps are a much different terrain than typical downhill skiing, there is a secret. You actually will use the same movements as normal skiing, just in a different fashion and using different tactics.

There are several different strategies to tackling moguls (metaphorically, not literally). You may want to vary yours depending on conditions, ability level, comfort level, etc.

Generally, the most common strategy (and the one I usually adhere to) involves the following:
1.) Plant your pole on the peak of the bump
2.) Turn on the side of the bump and across the back/downhill side of the bump.
3.) Continue your turn as normal.
4.) Stay in your turn until you slow enough to a comfortable speed while spotting your next bump to plant and turn around.

By simply focusing on planting on the top of the bump and then turning around its side, you will find a smooth rhythm that should help.

Note that this is not the same as skiing a "zipper" line down between the moguls like the pros. That requires much athleticism, strength, and endurance.

David Lind and Scott Sanders, in their book The Physics of Skiing, describe to readers, "When skiing moguls, the skier should unweight - that is, release the edge of the ski - at the sides of the trough where the normal force is reduced and then skid the ski using counterrotation of the body, which will set the opposite ski edge into the snow and initiate a turn."

A little technical, so let me explain. Basically, you are naturally going to experience some flexion and extension of your knees. Let them do this - don't go against it. You want to keep your hips the same distance from the ground so that your upper body doesn't bounce much vertically. The bounce is going to come from flexing and extending your knees underneath your body. Another way to think of this is that you will be picking up your skis off the ground and then landing back down on them.

Turning on the sides of the bumps, or ideally, the peak of the bumps, allows you to maximize your movements when the force on your skis from the snow is at a minimum.

Lind and Sanders summarize by writing, "Simply stated, this physical analysis shows that skiing a banked turn off the top of the mogul is the easiest and most effective strategy for skiing a mogul slope." Don't just take it from me - there you have it from the physics experts.

So, remember to NOT turn before a bump in the icy part where everyone and their brother tries to turn. Do turn on the peak of the bump where there is soft snow that no one skis on. This makes it much easier to turn your skis, and also is much easier on your knees and legs (especially beneficial to mature/experienced skiers and casual skiers).

Also, balance, the "Foundation for the Rest," becomes critical in the bumps. Make sure you have a good, central stance and that after your pole plants, you keep your hands and arms in front of your body.

Trying to keep it simple, this is what skiing the bumps all boils down to. Follow the above tips, and you'll look more like a skier and less of a linebacker on the slopes.

Tuesday, March 24, 2009

Are Your Skis Keeping Up With You?

In my last post, I went over some of the basics of ski design and engineering and how these characteristics affect your skiing. Now, I am going to brag a little about my latest ski purchase, a set of Rossignol Radical RX 9's. I bought them from Mike Stewart, one H-E-double hockey sticks of a skier - a Level III PSIA at Wisp Resort and a Rossignol sales rep.

Why did I get these skis? A few reasons.

First, they have an amazingly chick-picking up color scheme.


Second, they have some physical characteristics I like too. When I was looking for skis this year, I wanted something with a stiff tail end and low torsion. Translation: the rear (tail) end of the ski does not flex or rotate much. What does this accomplish? This absorbs energy throughout the turn and then releases at the end of the turn, resulting in a turn that "shoots" you out at the end. Bottom line, I wanted something that would rip. These did the trick. They also have a sidecut radius of 13 meters - can you say tight turns? If you are more of an advanced skier who is looking for some skis that are speed demons, super responsive, and carve up the whole mountain, these are the type to get. Tell your ski shop that you want a low torsional, stiff tail. I also went up 5 cm in length from my previous skis to 165 cm. This lets me go a little faster. All I have to worry about now is controlling these rockets on my feet. These things are a blast to ride on.

Also, I want to point out that these skis are a 1-2 year old model. You do not have to have the newest high end skis to get great skis. I found these, demoed them, felt how they performed, liked them, and purchased them. Done deal.

Are your skis keeping up with you? If not, it may be time to visit the ski shop to look at some newer skis.

Monday, March 16, 2009

How Ski Technology Affects Your Skiing

I have been hearing many questions lately about ski equipment.

Does it make a difference if I use short or long skis?
Old or new?
What really is the difference in equipment?
How much does it really affect my skiing?

Although most people think that equipment doesn't really affect performance (and to a certain degree this is true), rapidly changing technologies in skis have made staying up to date with equipment more important than ever. More and more, the equipment you have is starting to make a difference in performance.

From Long Skis to Short

The majority of ski equipment questions arise from the good old-fashioned long, straight ski to the newer shaped and shorter skis primarily in use today. Around 1990, skis started to come equipped with shaped, or parabolic, edges as opposed to skis that had very little sidecut to them. That is, older straight skis had a nearly constant width from the tips to the tails. Newer skis typically have a wide tip, narrow waist, and wide tail.

Now, what does this do?

The reason that shorter shaped skis came about are because of the easier turns that are made possible. Long gone are the days of measuring your ski height by holding your arm up high and buying skis that came to your fingertips. Nowadays, beginners use skis from chest to chin height, while more advanced skiers typically do not ski on boards longer than their own height. The shorter skis allow more better control of the skis, thus making turns and maneuvers much easier. Try going out sometime and skiing on verrryyy short skis. Although they will be a little less stable and feel somewhat flimsy, you will find it almost too easy to turn your skis. The appropriately sized skis can put the dream in dreamy skiing. The sidecut in a ski also accomplishes easier turns. If you layed a shaped ski with sidecut down in the snow, it will actually turn by itself. The sidecut causes the edges to catch in the snow and thus turn the ski. Compared to straight skis, these new shaped slabs of skis will rock you into a whole new ski generation.

While ski size is the most important factor in the equipment, there are other mechanical characteristics as well. Torsional stiffness, ski flexure, and other properties determine how your ski will react to your movements and the snow. Racers like stiff torsion in the tails to transfer a maximum amount of energy into their next turn. A small sidecut radius allows tight, carved turns. It is these elements of your skis that allow you to rip down a mountain while somehow miraculously staying upright on size 160 shoes.

Tuesday, March 10, 2009

Balance - The Foundation for the Rest

If you have ever been in one of my lessons, you know that I always preach "balance" as the key to skiing. It is the first thing I teach, no matter what level the lesson. This skill is important if you are skiing the small mountains or the luxury ski resorts. Balance incorporates all of our movements in skiing. Without good balance, we are not able to make effective ski movements to control our skiing.

If you play any other sports, many of the movements are the same and will be easy to relate to.

There are a few parts and key things to focus on to maintain a balanced stance throughout your skiing:

1.) Feet width - Ideally, you want to position your feet so that they are shoulder-width apart relative to one another. This is most people's body's natural stance. In women and children, the stance will tend to be slightly wider (feet are further apart) due to the anatomy of the pelvis and femur (upper leg) bones. You can practice this anywhere - at home in front of a mirror, in the lift lines or on the slopes. By giving yourself an appropriately balanced stance with good feet width, you will enable yourself to make better movements in your skiing.

2.) Ankle flexion - This is quite possibly the most overlooked skill in advanced skiers. Ankle flexion is a very important movement in maintaining proper balance during any type of skiing. The movement you want here? Imagine you are taking your foot off the gas peddle in your car (or off the brake if you are a speed demon). Flexing the ankle so that your toes point towards the sky is called dorsiflexion. You want dorsiflexion in both ankles while skiing, especially throughout your turns and especially on your inside ankle. By incorporating the apprpriate ankle flexion into your skiing, you will allow your legs to make more natural and effective movements that will result in smoother and more effortless turns. Conversely, you do not want to push down with your ankles/feet, producing plantar flexion or extension of your ankles. This often happens if your are pushing down or trying to pressure your outside ski during a turn - avoid this!

3.) Knee flexion - While "bending your knees" is probably one of the oldest sayings in the book, right next to "lean forward," proper knee flexion is essential to maintaining good balance in your turns. There are two types of knee flexion you may have: horizontal and vertical. When you bend your knees, and your femurs (thigh bones, as I've heard it said) become parallel to the ground, this is horizontal knee flexion - your upper leg is horizontal, like the picture to the left. Horizontal Knee Flexion - Notice how the skier's upper legs are closer to parallel with the ground and that the hips move backwards relative to the feet.

This is bad. When you have horizontal knee flexion, your hips will revert backward and your weight falls instantly backwards. I don't need to tell you this is bad - afterall, you always want to "lean forward!" When you bend your knees and your upper leg is perpendicular to the ground, this is vertical knee flexion - Vertical Knee Flexion - Notice how the skier's upper legs are more perpendicular to the ground and the hips are directly above the feet.your upper leg is vertical, yet your knees are still bent. The picture on the right shows this. That is what we want. When you have vertical knee flexion, it positions your body in a central stance while still properly flexing your joints.

4.) Eye contact - Make sure you look where you want to go. This means in front of you, not looking down at your skis, not at the tree 20 feet ahead of you. Have you ever been walking in the mall or on the sidewalk, been looking at a window showcase, and before you realize it you start walking in that direction? Same thing applies here. Your body will naturally follow where your eyes steer. Therefore, when skiing, focus your eyes on the apex of your next turn, around the tree, so that your body will go that way. This is something especially important to teach beginner skiers while they are getting comfortable with their new five foot long feet, but it is also something that expert skiers need to revisit every once in a while.

5.) Body alignment - Although it may seem obvious, you always want to make sure you are keeping your hips and upper body aligned and directly above your base of support, your feet. Not to the front, not to the side, not to the back. Many advanced skiers are guilty of violating this rule when they try to get very dynamic and flashy in their skiing. You try to get on a high edge angle by leaning your body to the side. Here's a little test to see if this includes you: Ski on an easy green trail. Try making wide, super G turns now, but going very slow. When you try doing this at a slow speed, you will fall straight over the side of your skis. Now, make sure you get up quickly and brush the snow off to make sure no one saw... We often get away with leaning our body sideways at high speeds because our speed and momentum are able to keep us upright. The lesson: make sure your hips stay on your center axis, your midline. They can move slightly, but should not cross over the vertical planes created by your skis. Also, for fore-aft balance, it is easy to tell if you are off-center in your skiing when either the tip or tail of one of your skis lifts in the air during a turn. Make sure you keep your whole ski in contact with the snow. This will maximize your balance, style, and control on the slopes.


Those are my top 5 balance tips. If you have any more or would like to comment on any material, please do so! Focus on these out on the hill, and you will see yourself in a more balanced position while sking, looking more graceful to the chairlift viewers above, and skiing more in control. Nothing feels better than that.